
Learn how to make the best rice from a 6th generation Japanese rice miller. The secrets to impeccable steamed rice are revealed.
Like fluffy, white sheets, unpainted canvases, and horizontal surfaces in your house, rice is waiting for you to put something on top of it.
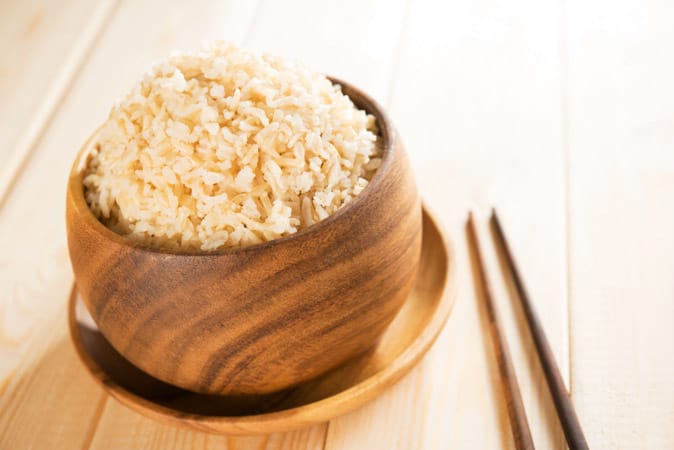
There are many types of rice, and many more ways to cook it, but this technique is for plain, steamed rice.
The Secret to Cooking the Best Rice
These notes are learned from a 6th generation Japanese rice miller, whose family has been in the rice business for 130 years. His Sumidya brand of rice is sold at Nijiya market, where he taught a rice class.
Step 1: Rinse Rice
This is different than washing. Pour cold water over and then drain.
Rice absorbs water, so you don’t want the rice to absorb the washing water which may cause the rice to smell or gran or lose its gloss. Thus, you just want to quick rinse it first.
Step 2: Wash the Rice 3 x
The most important step is to wash your rice. Three times.
This removes excess starch from the rice granules to yield fluffier rice.
It may seem ordinary with no further explanation needed, but how exactly do you do this?
- Pour water over the rice to cover at least 1″ above the surface of the rice.
- Stir gently with your hand in a circle 10 times
- Pour off as much water as you can.
- Repeat two more times.
Do not wash the rice until clear.
Perhaps with a basmati rice, the technique would be to wash until the rice is clear. However for Asian rice, the water should be like white milk. This makes the rice shinier.
You also should not wash the rice too harshly to damage the surface of the rice or cause it to lose excess starch that will affect the flavor.
Step 3: Add the appropriate amount of water
Once the rice is washed and drained, you must add the right amount of water.
For white rice, the ratio is one cup of rice to 1.2-1.4 times the amount of water.
- 1.2 times the amount of water if you want your rice granules a little chewier.
- 1.4 times the amount of water if you want your rice granules softer.
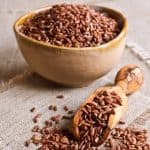
For brown rice, use 1.4 times the amount of water.
It should be noted that the amount of water can vary depending on how old the rice is. Sometimes, you might see a “new crop” sticker on the bag of rice indicating its recent harvest. In that case, you would use less water (about 1:1 ratio), otherwise, the rice would be too soft.
Step 4: Soak the rice
You must soak the rice to make it fluffier.
- White rice should be soaked for 2-4 hours.
- Brown rice would ideally be soaked for 8 hours.
The amount of soaking too can vary depending on the brand of rice and how recently harvested it is.
Step 5: Cook rice
If using a rice cooker, use the appropriate setting for white or brown rice.
To cook on the stovetop:
- Bring the water and rice to a boil in a pot.
- Simmer for 10 minutes covered.
- Lower the heat and cook for another 10 minutes on low.
- Turn off the heat and let the rice sit for 10 more minutes.
Step 6: Mix well after cooking
This step is a little unusual. You have probably heard of fluffing rice with the tines of a fork, but this step involves more than scraping the top.
- Open the rice cooker or lid once finished. You need to cool the rice down and release excess steam.
- Make a cross to divide the rice into 4 quadrants.
- Shuffle the rice spatula around the edge of the pot to loosen up the edges.
- Scoop from the bottom up to the top.
The rice needs to be mixed well to evaporate the water and bring the temperature down to make the rice taste sweeter.
Don’t just serve it right away. With premium rice, you can taste the difference before and after mixing.
Mixing also makes the surface of each rice granule clearer, stickier, and sweeter. It will taste a little more nutty with a hint of sweetness at the end.
Stet 7: Cool rice
After mixing, move the rice to a different container and cover with a paper towel or thin tea towel to let the rice cool. The Japanese way to serve rice is at body temperature for the best tasting rice.
If using a rice cooker, it should be kept warm for just 3 hours. Longer than that and the rice may change color and start to smell of bran.
To store, it should be wrapped tightly in plastic bags without air and frozen. Reheat in the microwave.
Bonus Tip
For California rice, the master rice miller recommends using a little rice wine with the water to make it tastier. Isn’t that interesting? Perhaps worth a try…
The Best Brown Rice Brand
The Sumidaya rice brand from Japan is terribly high priced at $6 per pound or $30 for a small five pound bag. The reason?
They use an ancient milling process with up to 9 individual steps, rather than milling the rice all at once. This allows the rice to retain its aroma and savoriness. The steps and temperature are also customized for the season, climate and quality of the rice.
It does taste sweet and is best cooked using the thorough steps listed above.
For a local California brand, Koda Farms organic, heirloom Kokuho Rose brown rice is half the price and has this extra goodness you can taste.
Related Posts
Thai Black Rice Pudding: the Superfood you’re not Eating
Hot Dog Fried Rice is Real & Easy to Clean Up
Vegan Kimchi Fried Rice is Fast & Luscious
P.S. Do you love rice and all things nice? Please spread the Asian ♥ and share!

Leave a Reply